Configuring CloudNippon SIP Trunk
with FreePBX
Step 1: Follow the screen below for easy configuration.
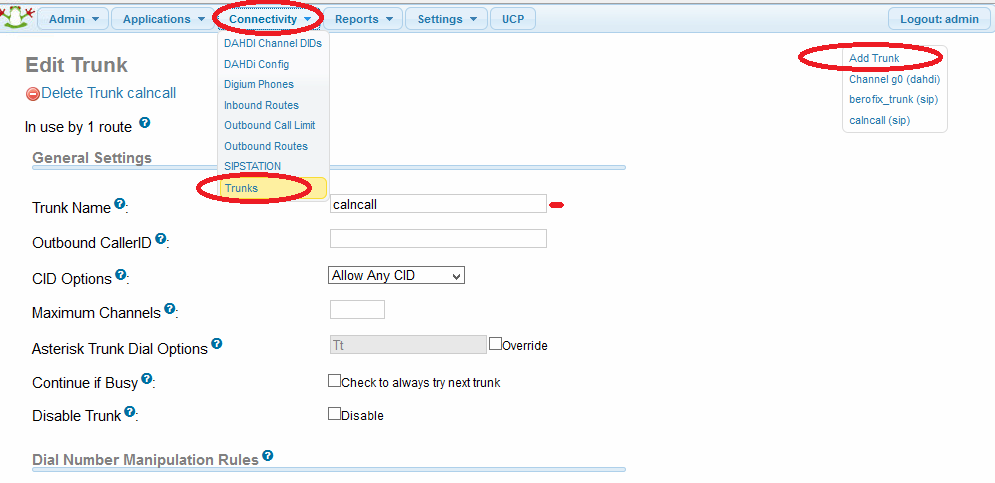


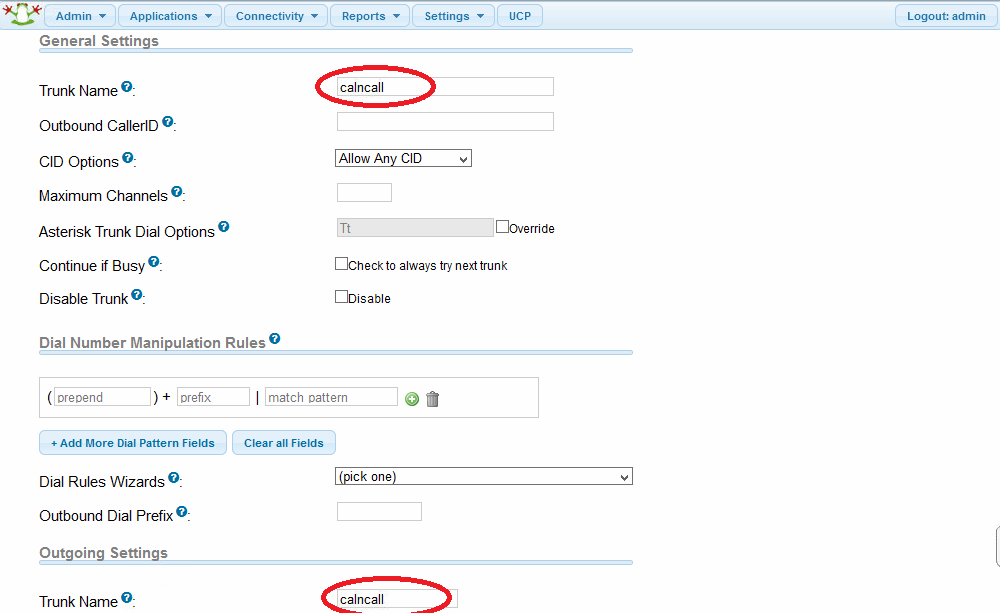

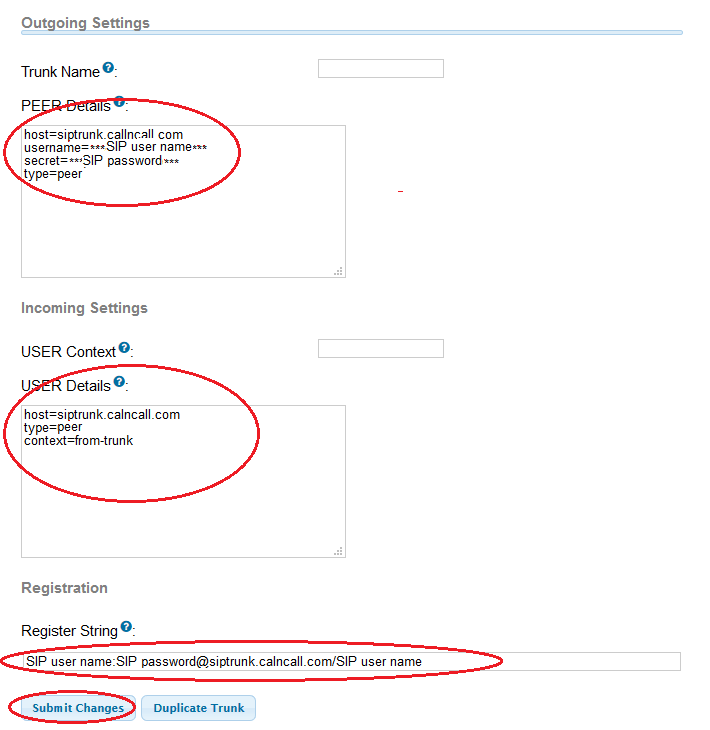

Outbound configuration with CloudNippon SIP Trunk
Follow the below steps to configure an outbound rule
Step 1: Go to –> connectivity –> Outbound Routes once you click outbound routes you can get below screenshot.


Step 2: You have to give Route name for your identification. Need to give dial Patten for this outbound routes default is X.
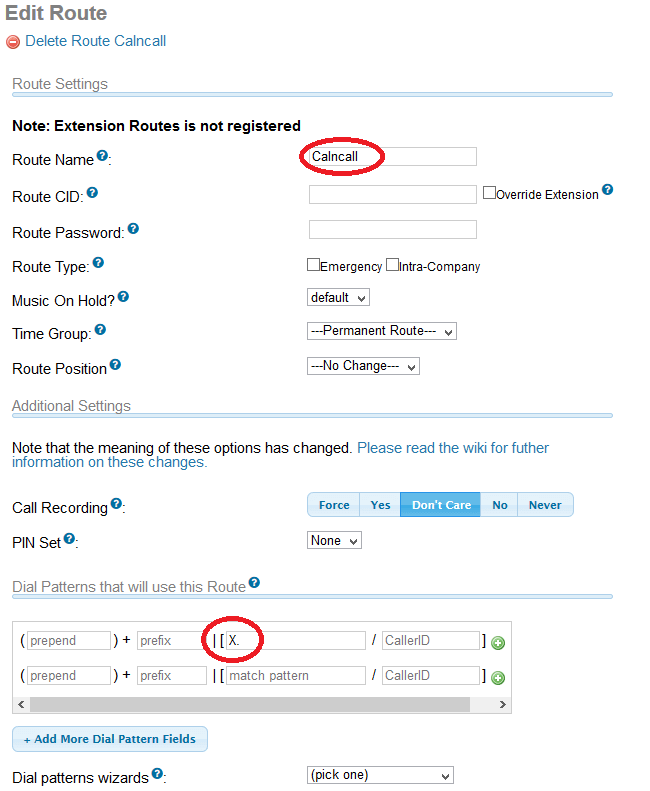

Step 3: Select the trunk sequence (which trunk you want use to make outgoing calls)
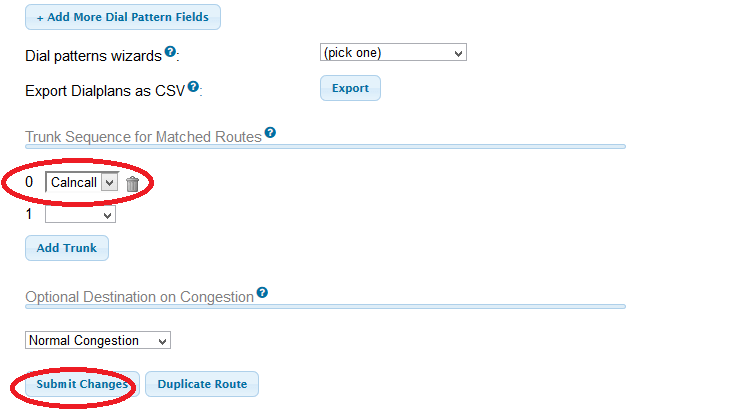

Once you submit you have to apply configuration on top.


Inbound configuration with CloudNippon SIP Trunk
Follow the below steps to configure outbound rule
Step 1: Go to -> connectivity -> inbound Routes once you click inbound routes you can get below screens


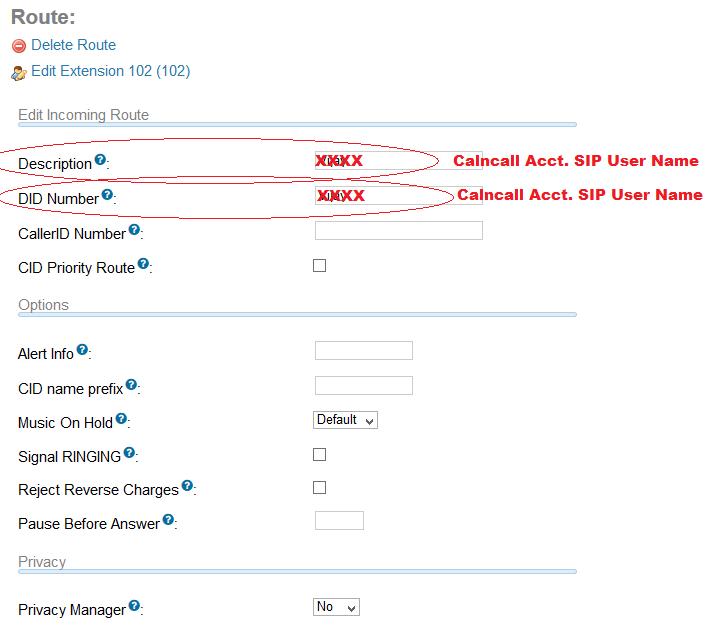
Step 2: You have to give Description for your identification. Need to give DID Number for this Inbound routes, it should be SIP Trunk User Name.

Step 3: Go to Set Destination Tab and Need to select where you want receive the call, it may be Ext., IVR, ring group
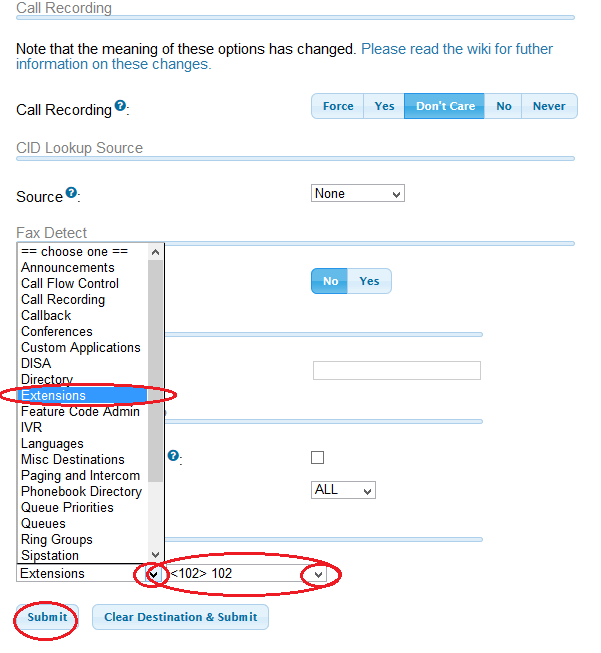

Once you submit you have to apply configuration on top.


